I was deep into researching building a flintlock rifle from a blank the first time I stumbled on the golden ratio or golden mean. It was a magical ratio that made your rifle look good. A few years later, I was working to improve my basic photography skills and stumbled upon the rule of thirds. This basic photography rule stemmed from the golden ratio that I had learned about previously. It appears all over in everyday life as it has been used by architects for thousands of years. To put it simply, this magical ratio makes things look good to the eye, including guns.
Affiliate Disclosure: This article may contain affiliate links. When you use these links, I earn a small commission from each sale generated at no cost to you. This commission helps me continue to put out free content. I work a full-time job that I am very happy with; therefore, I don’t need this commission and am not obligated to speak highly of any product. Everything written is my own opinion: the good, the bad, and the ugly.
The Golden Ratio
The golden ratio is an ancient formula that has to do with proportionality and growth rates in nature. As I mentioned earlier, it is everywhere. Even in the human body in places like our bones and DNA. Our minds recognize this pattern in nature, and it is appealing to us. This is exactly why it is used so much in professional photography.
The Golden Ratio is 1:1.618, but I find it more useful as a percentage. Either 61.8 % or 38.2 % can be used to get a quick calculation of a measurement you need. You can now see why it has been simplified in the photography world as the rule of thirds. Days can be spent looking into the origins of both, for our discussion, we’ll keep it simple.
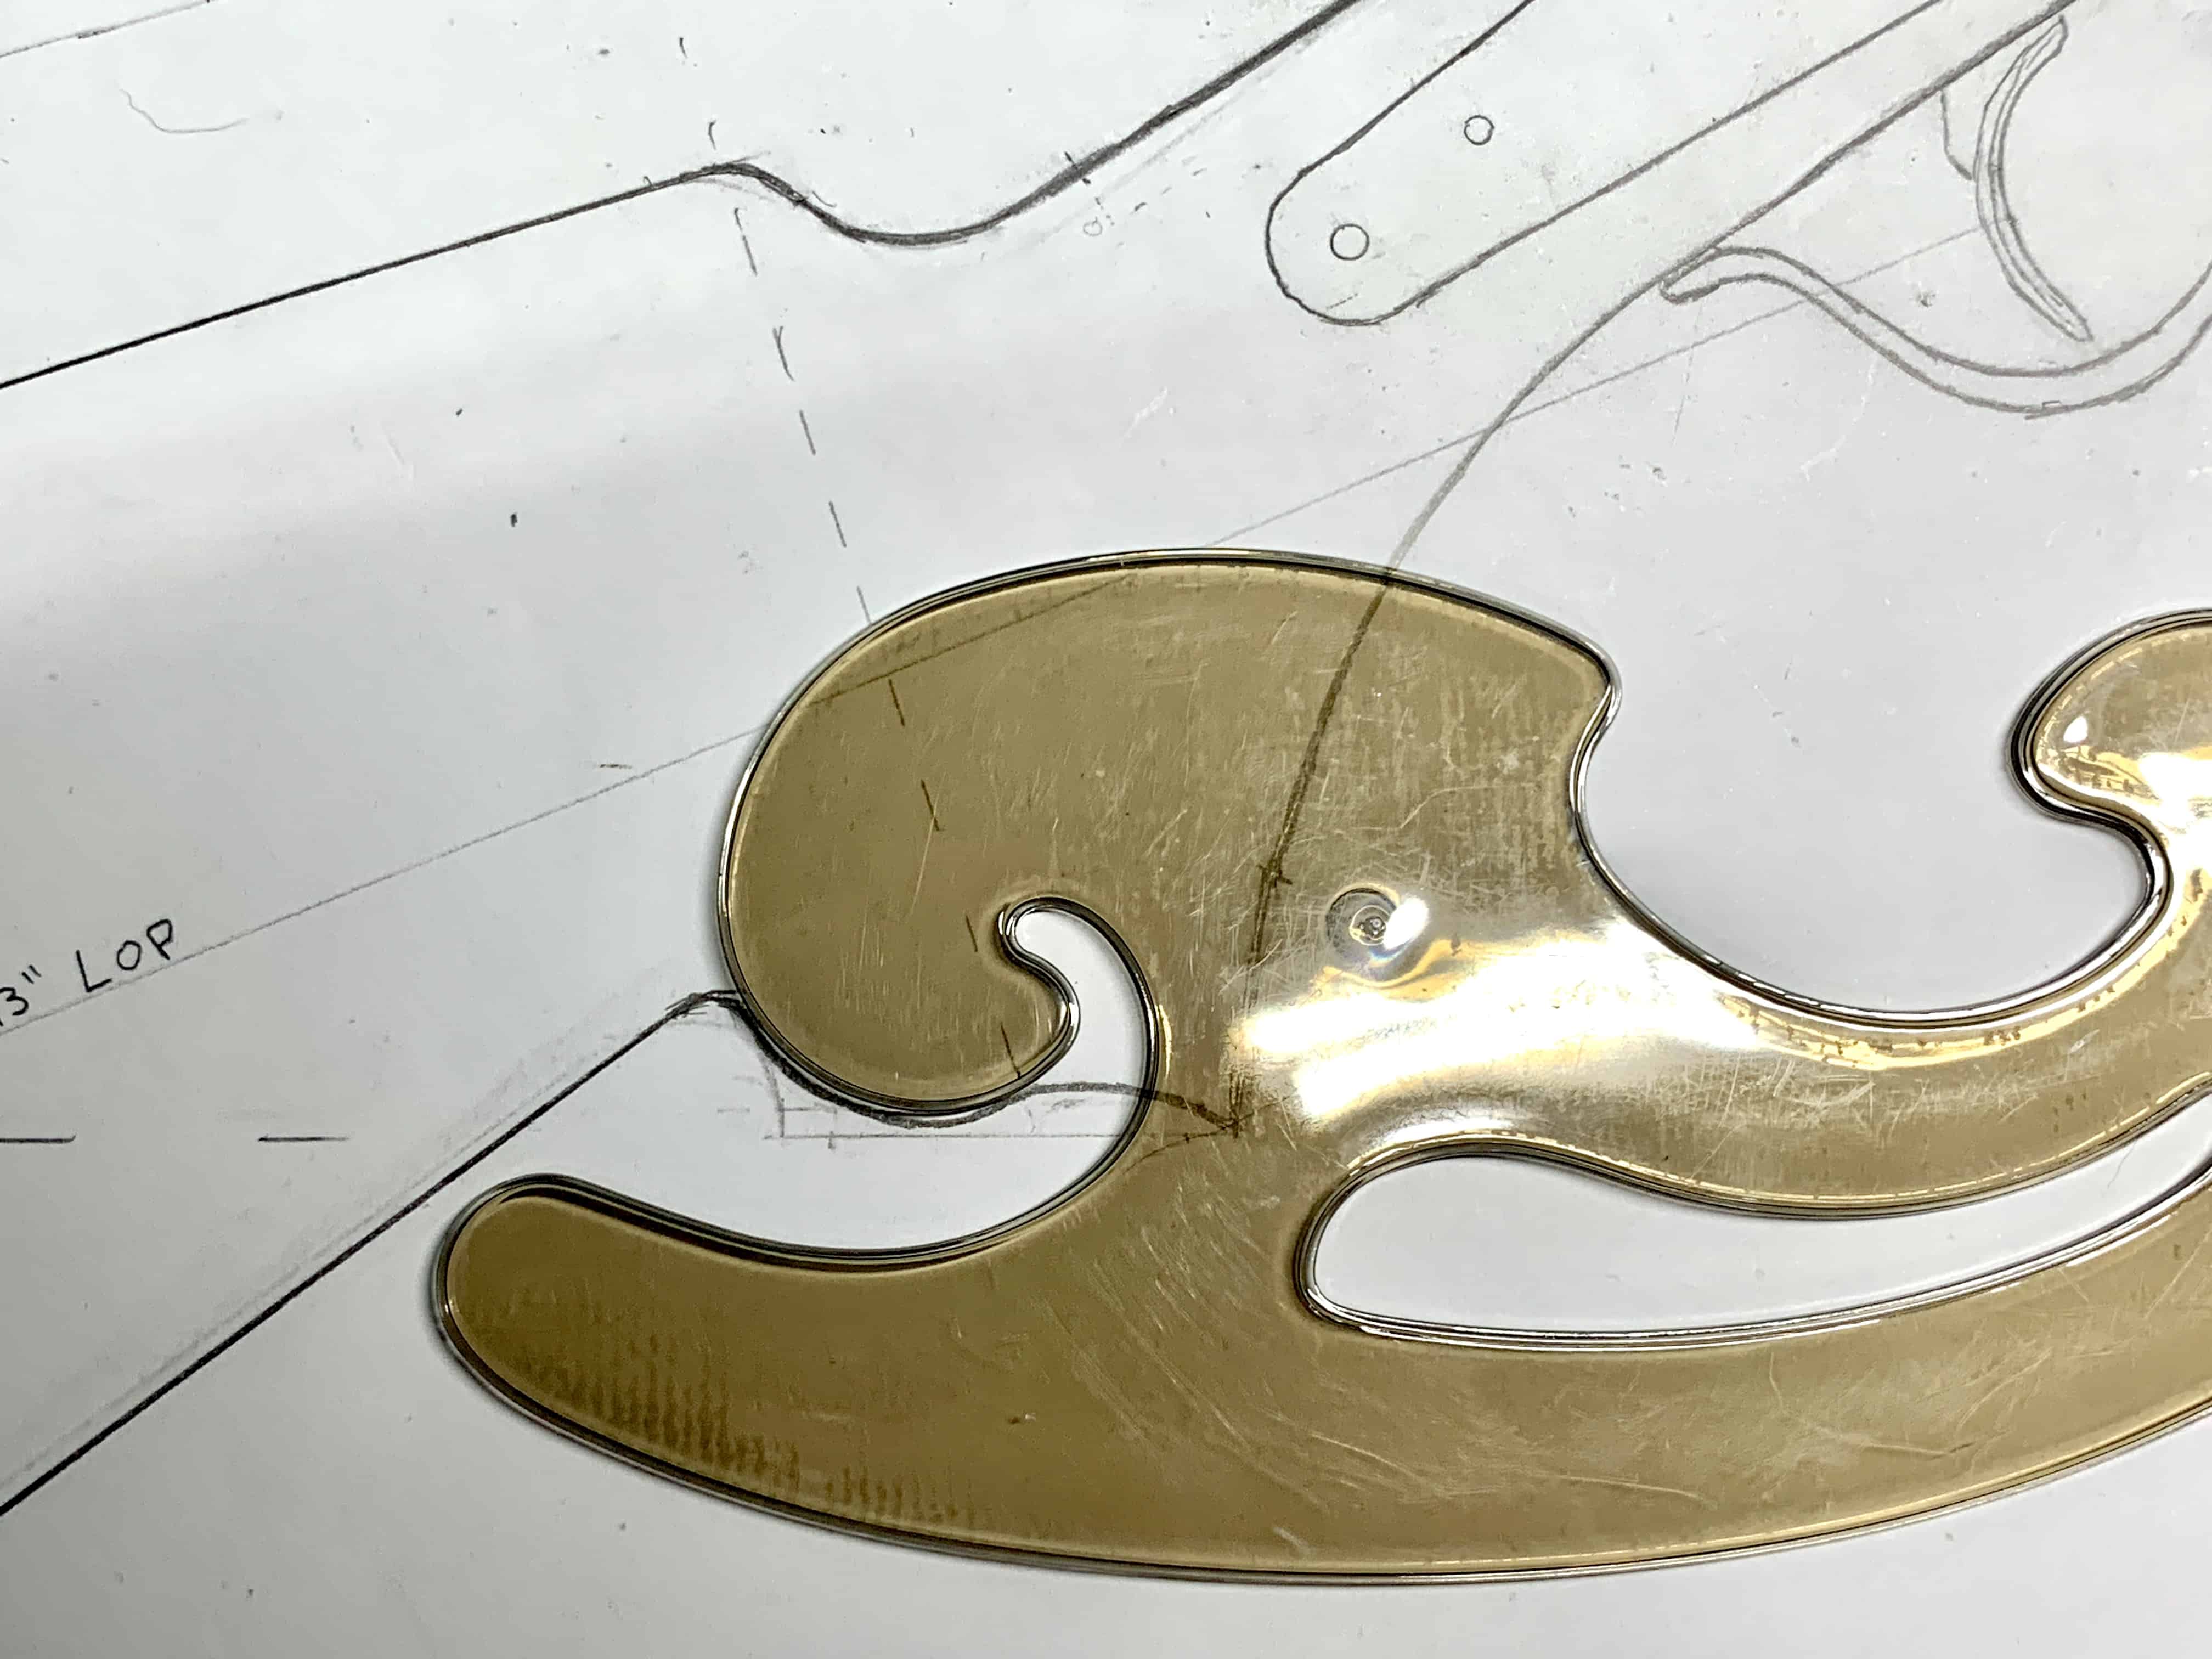
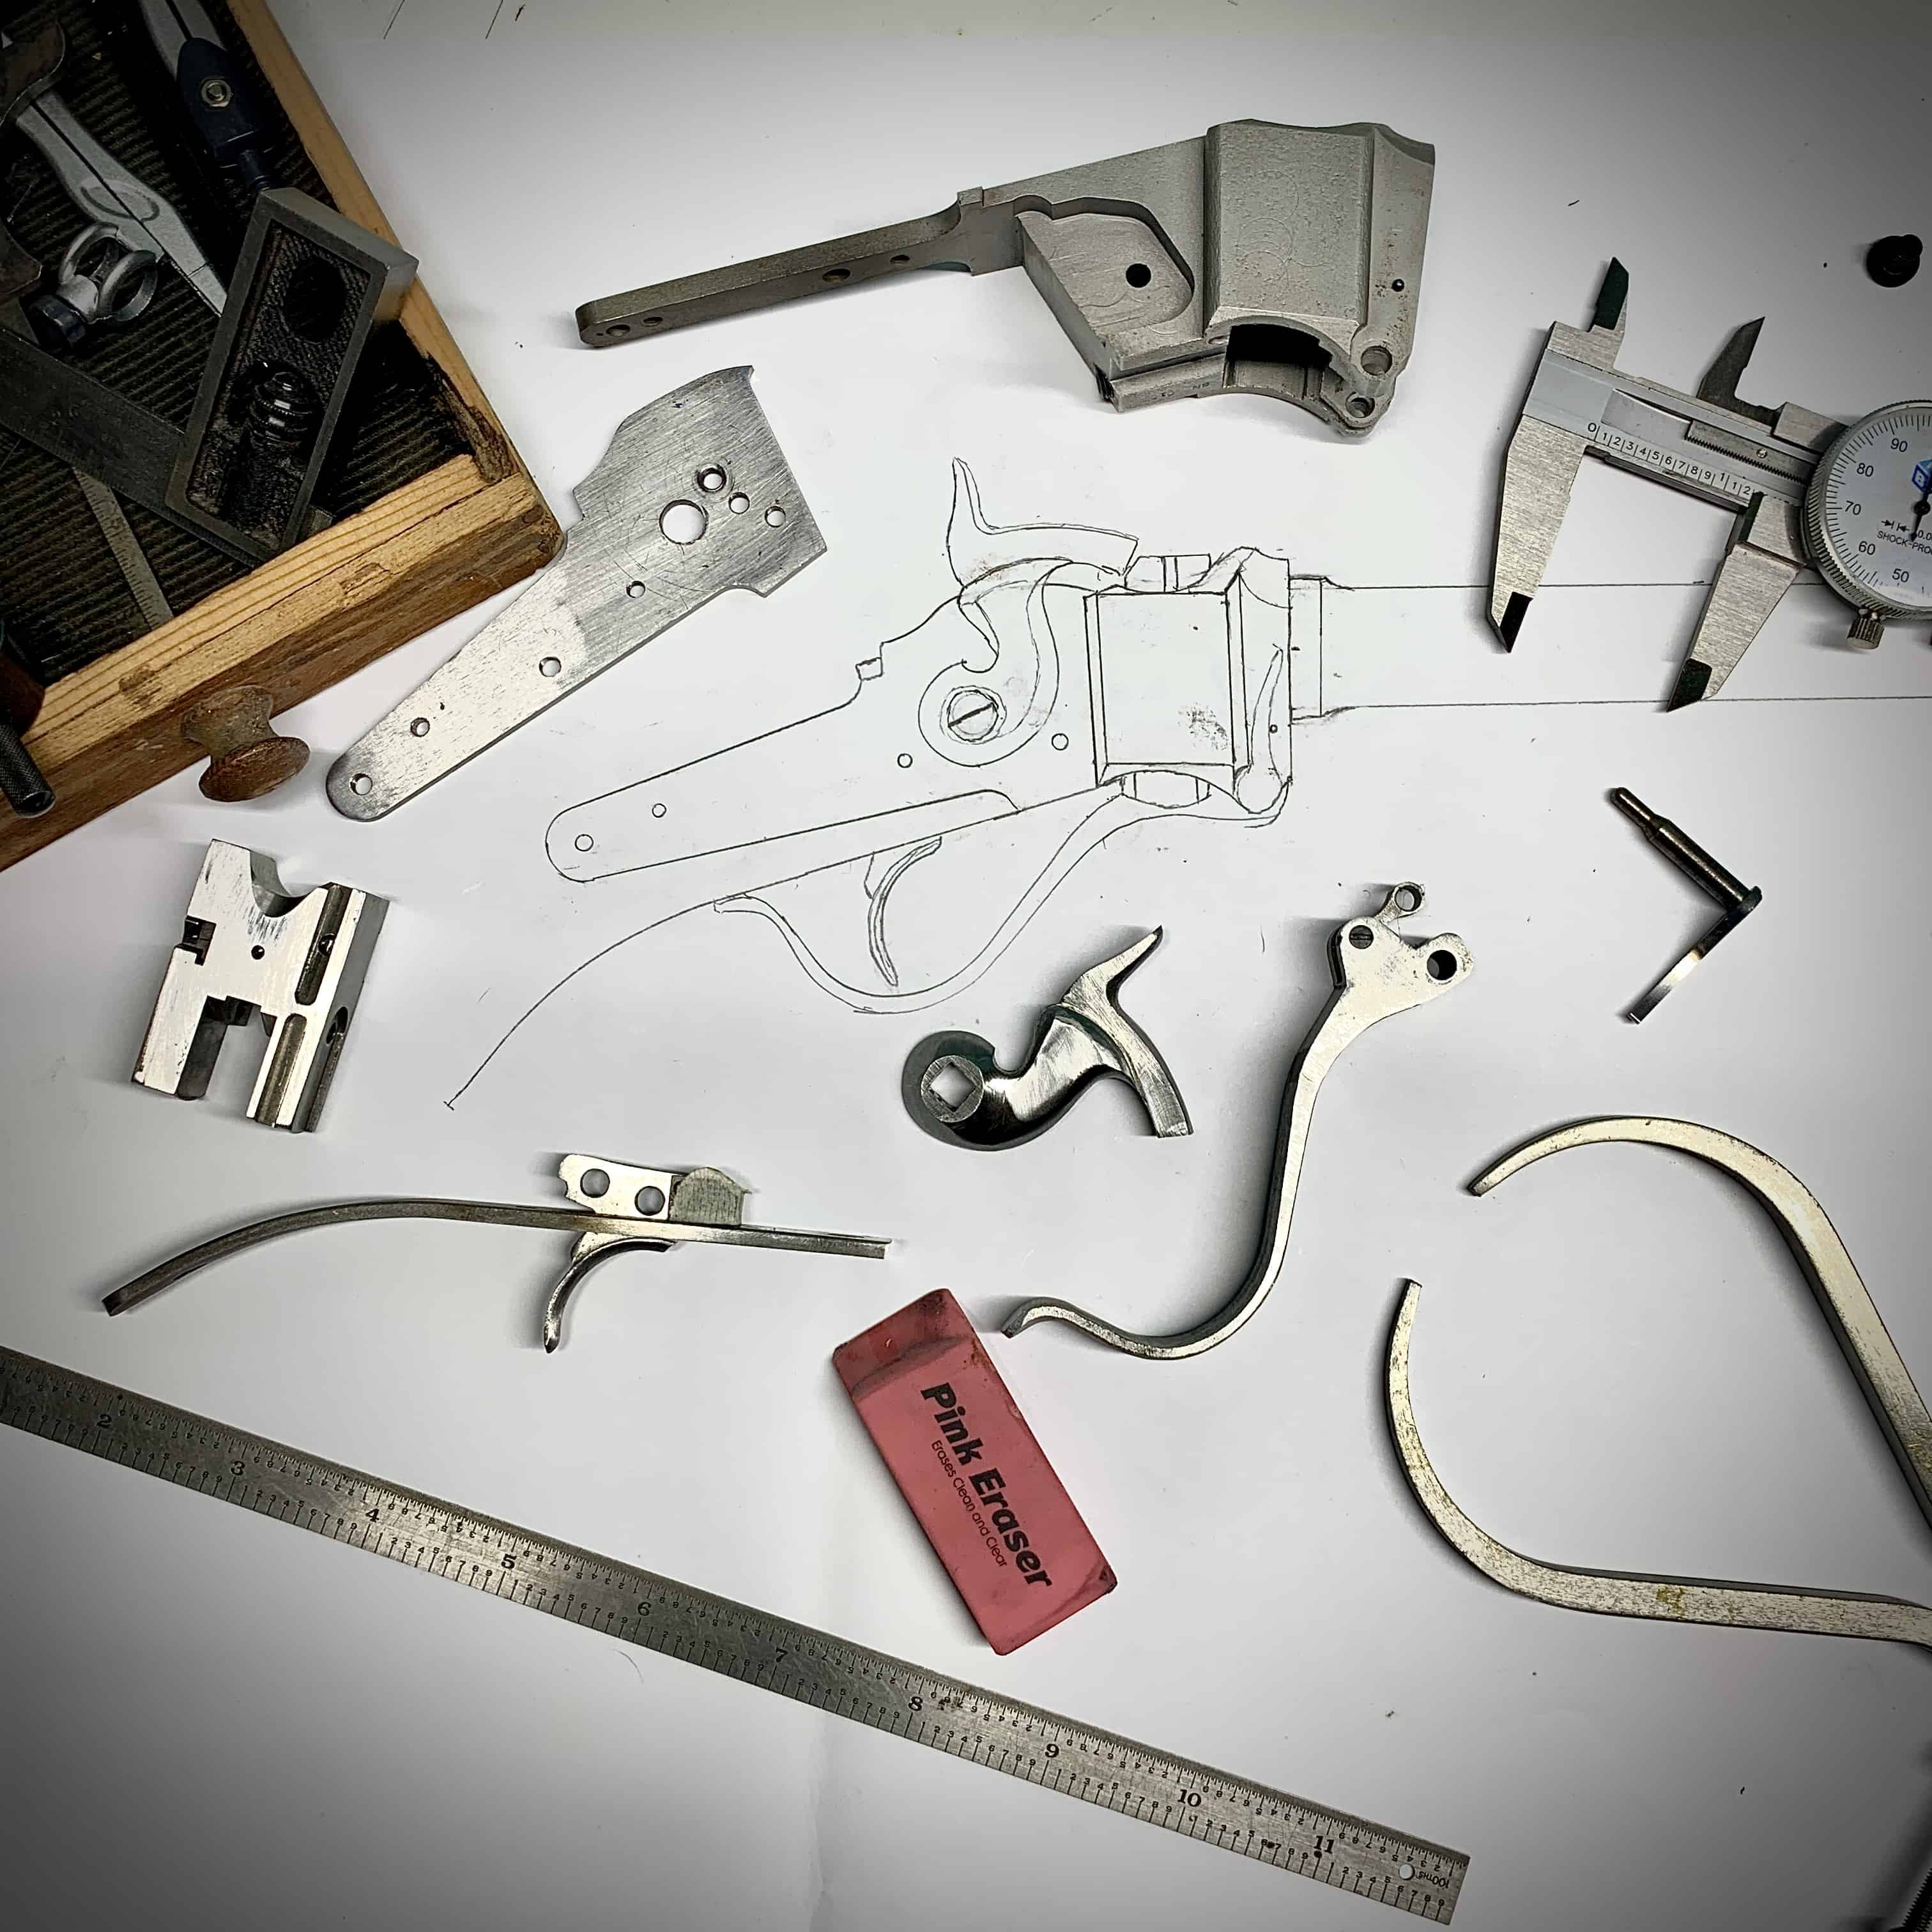
You can’t talk about the golden ratio without mentioning French Curves. I have used French Curves to help layout checkering patterns for a year or so now, but not until recently have I started using them much more frequently with great results. These are stencils that are used to give you a “Golden Spiral”. This “golden spiral” is a series of arcs and curves that use the golden ratio to make them look very appealing to the eye.
I use a stencil set similar to this one when laying out a stock design or checkering pattern. If you want to dive into the French curve even deeper, this wikihow.com article describes how to make one yourself.
So how does this apply to building rifles?
Golden Ratio in Gun Design
The golden ratio is used very frequently in gun design. It can be found on everything from cheekpieces on your favorite bolt rifle to flintlock hammers on an 18th-century fowler. It is the basis for how your traditional American classic bolt action rifle is laid out. I mentioned sling swivels in the previous section, as this is a place where I tend to use it a lot. Correctly positioning it on the toe line of the stock is nerve-wracking for me, when drilling a hole in a perfectly good stock, you’d better put it in the right spot.
Applying the Golden Ratio to a Cheekpiece
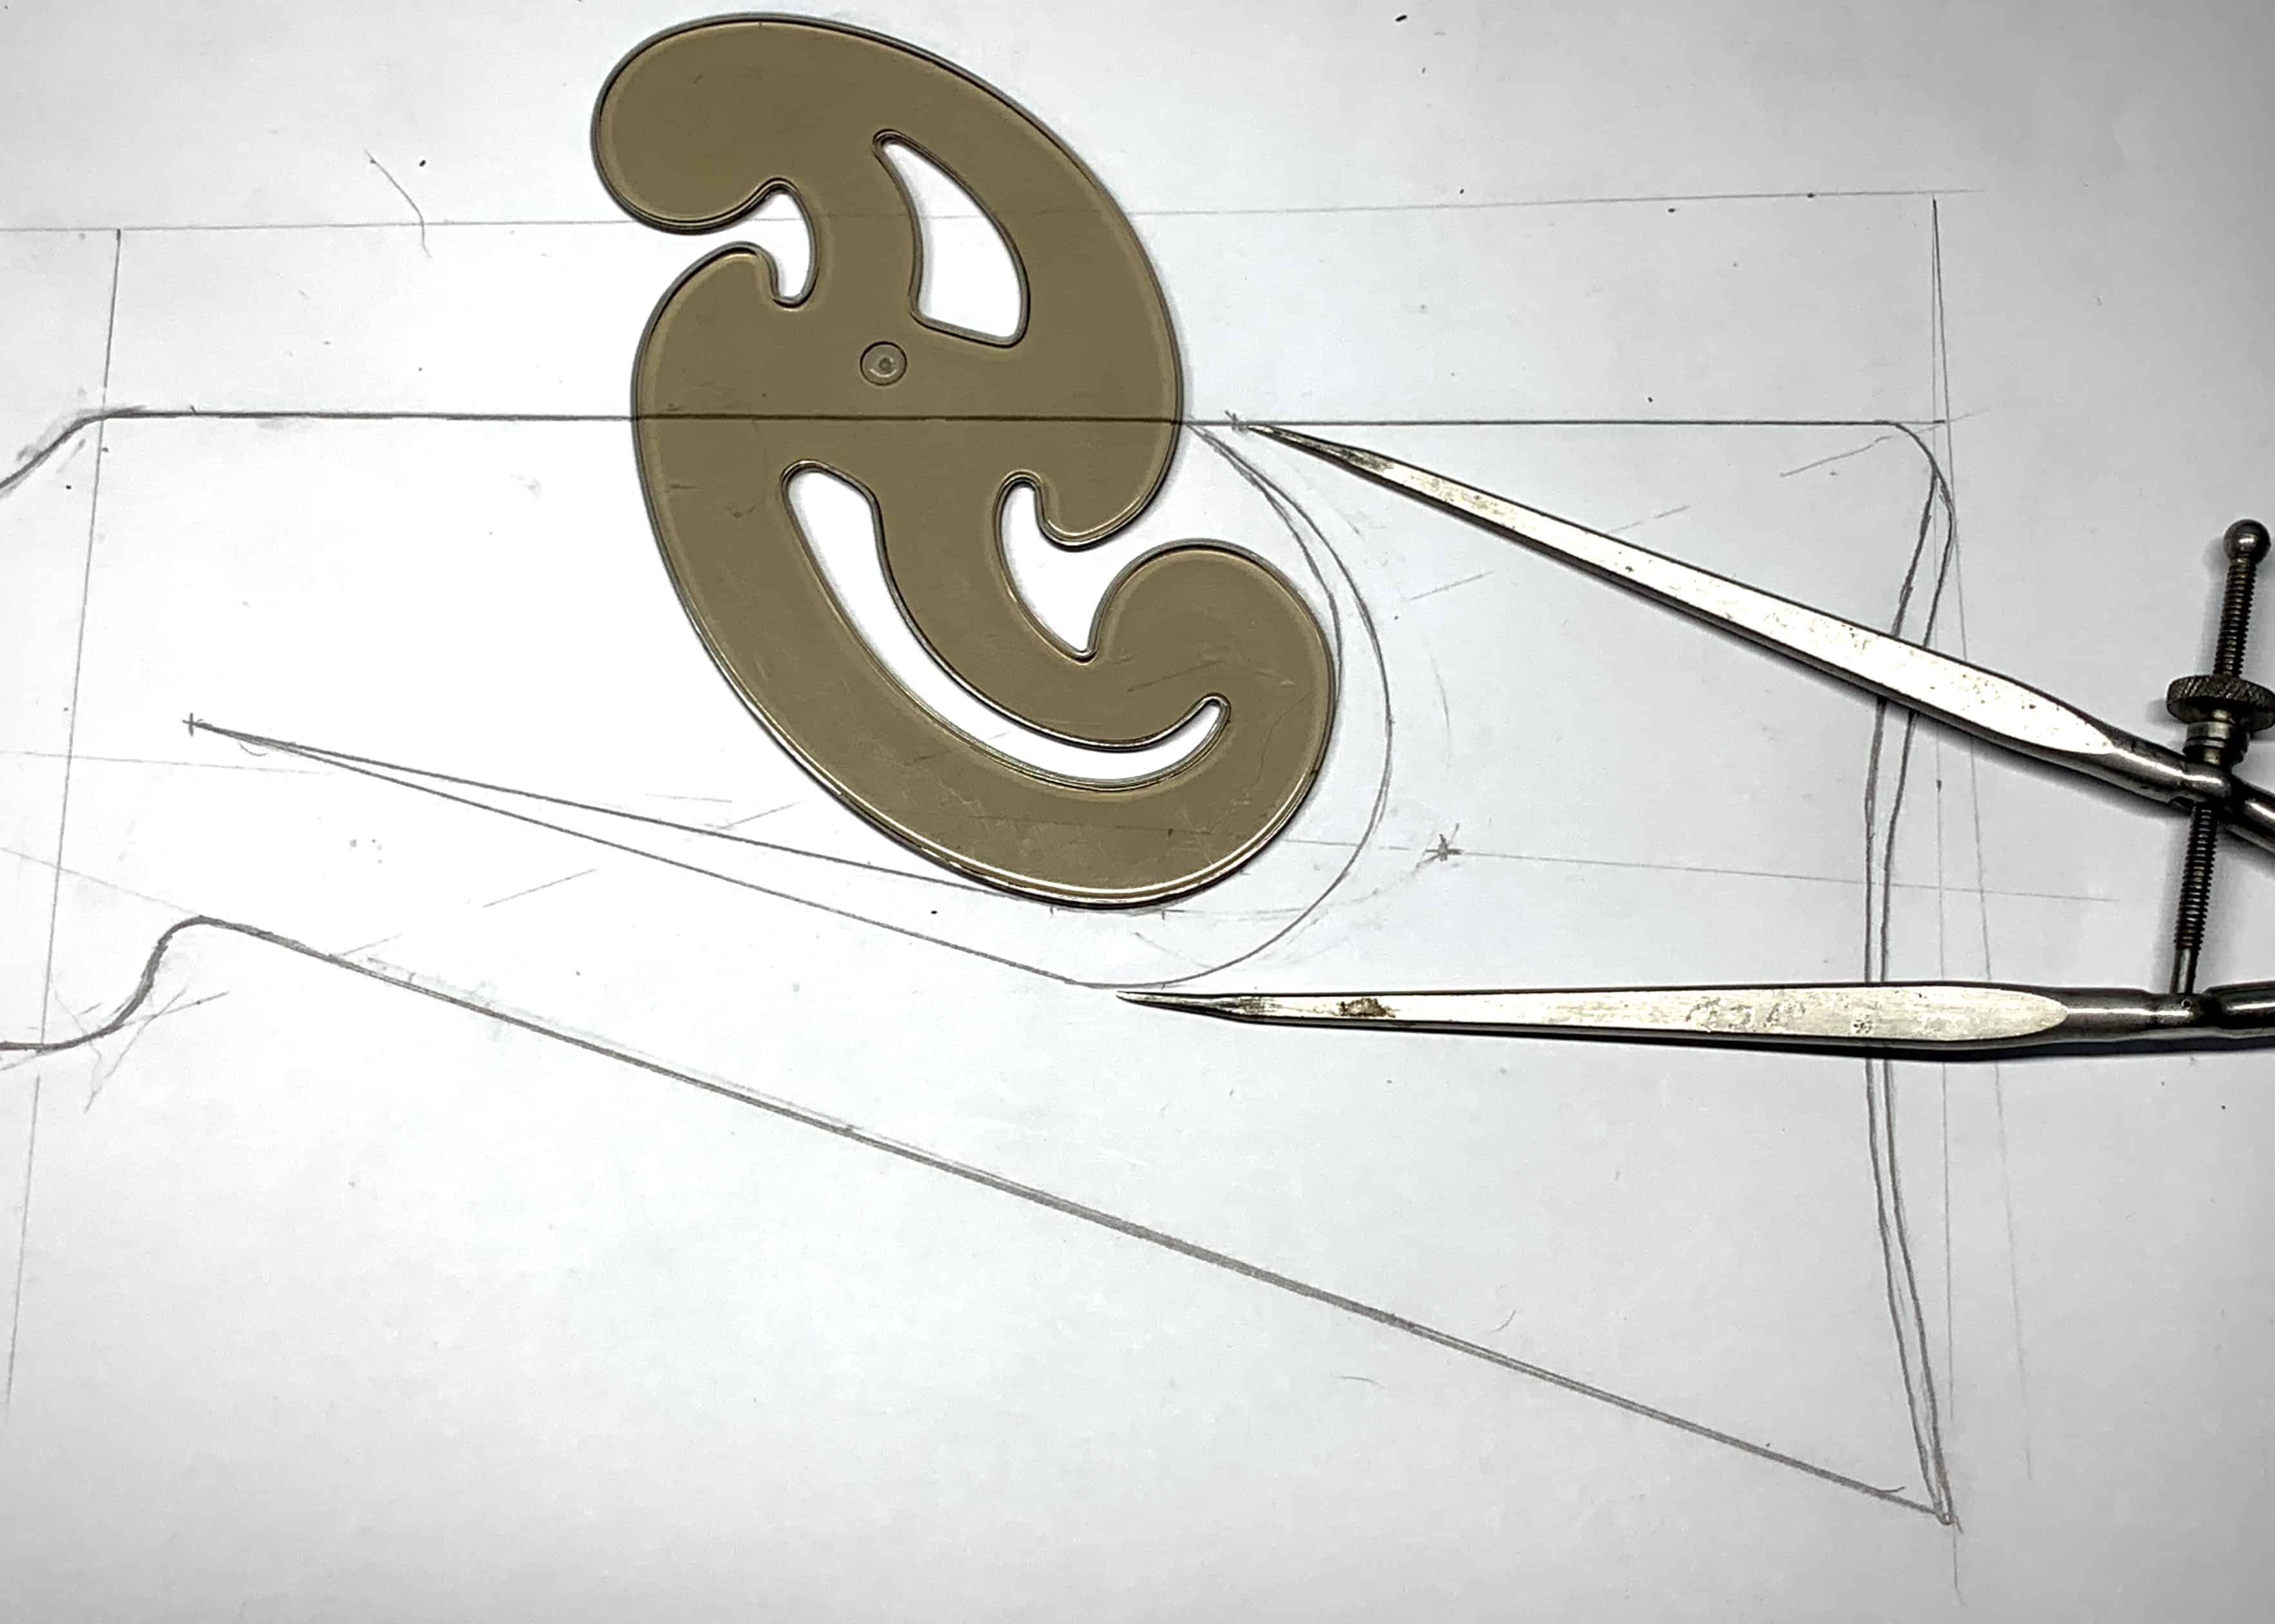
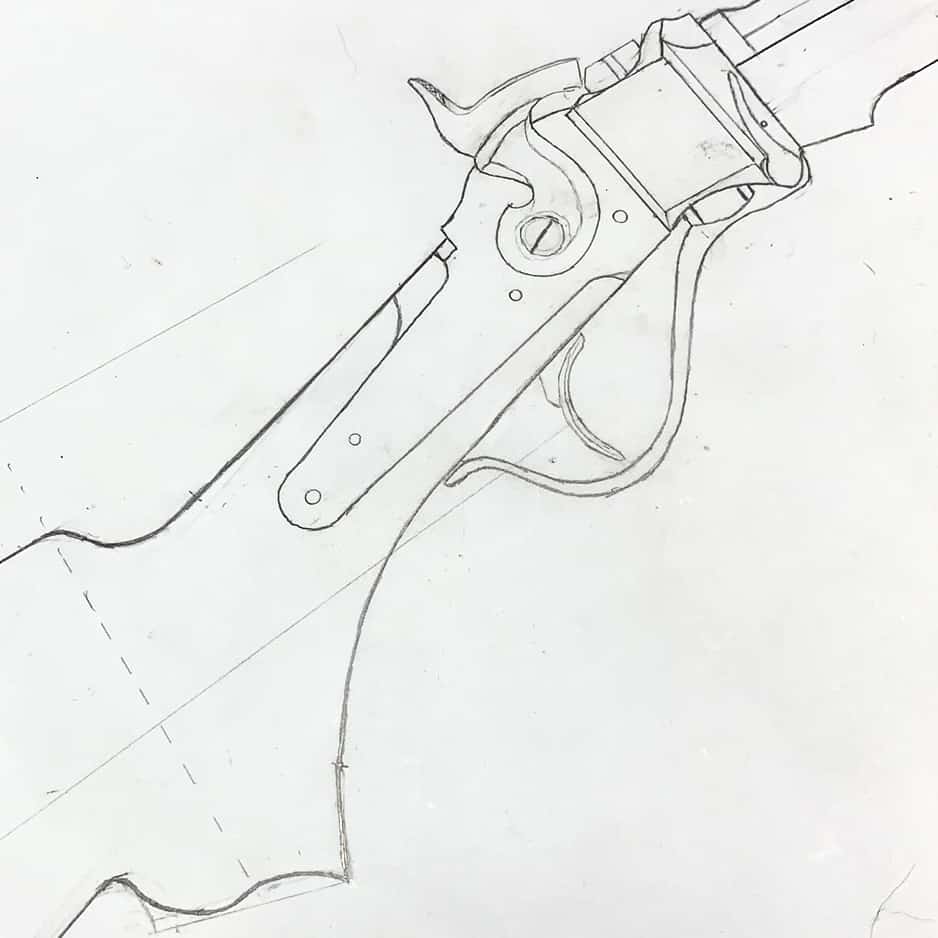
A cheekpiece is another fantastic area to apply the golden ratio. I’ll be referencing the image above for the remainder of this section. For those not super familiar with stock terminology, the cheekpiece in this drawing has two lines: the top one is the cheekpiece itself, and the bottom one is the shadow line. To lay out the cheekpiece on this particular rifle, I started by drawing some endpoints and breaking up the buttstock section using the golden ratio. I decided to use the end of the toe line as my reference point for this calculation, you can see this point where the cheekpiece line and shadow line converge on the left side of the image.
From here, I calculated the 61.8% and came up with the endpoint of the cheekpiece. This number can be interpreted in many ways and still be made to work(you can see my erase marks when experimenting with how I wanted it to be laid out. I decided on using it for the end of the arc on the cheekpiece line.
Use coupon code KTG10 to get 10% off your order of $150 or more at Brownells.
Next, I applied the golden ratio to the bottom line on the cheekpiece(not the shadow line). I measured 38.2% up from the toe line in a couple of spots along the cheekpiece, this gave me a straight line that tapered away from the toe line. For example, at the end of the toe line, the stock is 2.600″ tall, 38.2% of that is 0.993″, I placed the line 0.993″ above the toe line there. Where the line begins to curve the stock measures 4.100″, 38.2% of that is 1.566″, which is where the lines ending point is. Keep in mind this really only works if your toe line is straight. Drawing this line, I was able to use the French curve to find an arc that was attractive to my eye that intersected the points that I had drawn.
This is just an example of how it is applied in some areas of the cheekpiece. This worked really well for this layout but may need to be adjusted for other stock designs on different firearms.
7 Essential Tools For the Beginner Stockmaker
Don’t Let it be a Crutch
The golden ratio works very well when laying out a stock design or trying to correctly position a sling swivel, but don’t let this overrule your personal judgment. I typically use it when I’m unsure of the placement of something. Sometimes I choose to fudge that ratio a bit one way or the other to make it look better to my eye. It is very useful but once again, don’t let it dictate everything for a build. Sometimes I have to shift the line one way or another, and it ends up working with the golden ratio from a different reference point that I hadn’t used. Trust your eye, after all our eyes are trained to pick up and identify the golden ratio naturally.

Written by: Kurt Martonik
Kurt is a Gunsmith, Reloader, Hunter, and Outdoorsman. He grew up in Elk County, Pennsylvania, where he became obsessed with the world of firearms. Following high school, Kurt enlisted in the United States Air Force as a Boom Operator, where he eventually rose to the position of Instructor. After his military service, he attended the Colorado School of Trades(CST) in Lakewood, CO for gunsmithing. Following graduation, he accepted a job at C. Sharps Arms in Montana, where he worked as a full time stockmaker and gunsmith.