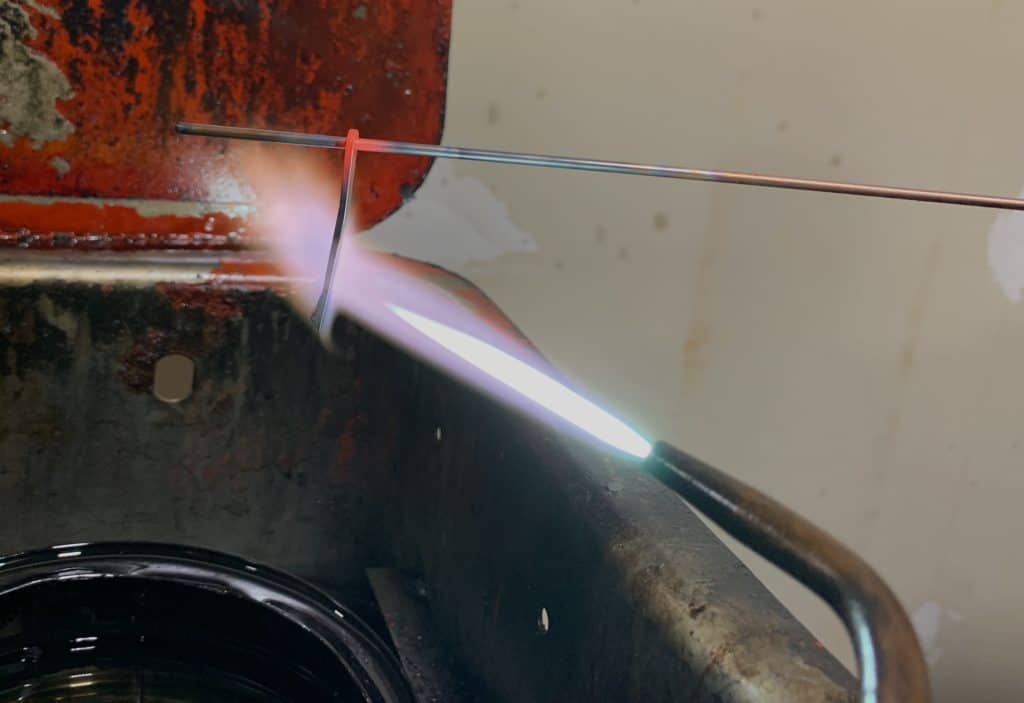
Oxy-Acetylene is frequently used in all things gunsmithing and is an invaluable tool when applied correctly. Brazing, welding, hardening, soldering, annealing, and tempering are just the tip of the iceberg when it comes to everyday uses in the shop. There are three main flame types that the gunsmith should know to get the most out of his oxy-acetylene.
I will be referencing and quoting weldguru.com pretty frequently in this article because they do a really good job explaining the flame types and how to get them. Frankly, I couldn’t do a better job describing the process than they do. I highly encourage anyone who wants to dive deeper into this subject to explore their website.
Affiliate Disclosure: This article may contain affiliate links. When you use these links, I earn a small commission from each sale generated at no cost to you. This commission helps me continue to put out free content. I work a full-time job that I am very happy with; therefore, I don’t need this commission and am not obligated to speak highly of any product. Everything written is my own opinion: the good, the bad, and the ugly.
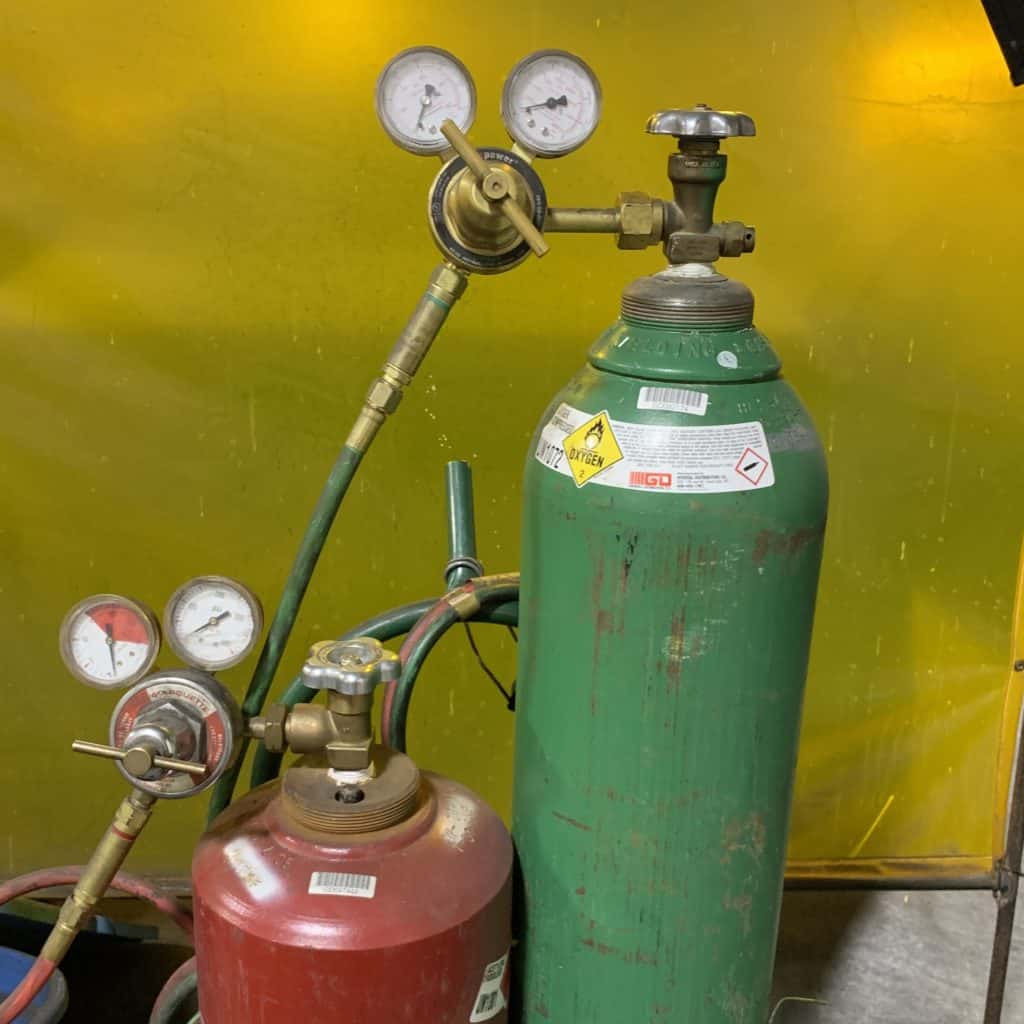
Oxy-Acetylene Safety
Oxy-Acetylene can be very dangerous if not used in the proper manner. This guide is an excellent resource to ensure you are operating your torch safely. I recommend having something similar to it displayed near your oxy-acetylene setup until you are comfortable with its operation.
Types of Flame: Why They Matter
The three main types of flame are; neutral, carburizing, and oxidizing. These types of flame can all be achieved with the standard tip. The differences in the flame are dictated by the ratio of oxygen and acetylene. Some flames will actually have a chemical change on the metal itself. While this chemical change can be very useful in some applications, it can have negative effects on others. Using the correct flame is important and will give you the results you are looking for without sacrificing the integrity of the material you are working with.
Use coupon code KTG10 to get 10% off your order of $150 or more at Brownells.
Neutral Flame
The neutral flame is a mixture of equal parts oxygen and acetylene and has no chemical effect on the metal you are working with.
This flame works great for general welding, and silver soldering.

“This neutral flame is obtained by starting with an excess acetylene flame in which there is a “feather” extension of the inner cone. When the flow of acetylene is decreased or the flow of oxygen increased the feather will tend to disappear. The neutral flame begins when the feather disappears.” –Weldguru.com
Carburizing Flame
The carburizing flame is an Acetylene heavy mixture and will add carbon to the metal at times. For gunsmithing, we know that adding carbon directly correlates to hardness.
Therefore, this flame is best used for bending, forging, and hardening practices. This is probably my most used flame. Hardening springs prior to tempering, case hardening small parts using kasenit or Brownells Surface Hardening Compound, and rehardening homemade drill bits and taps.
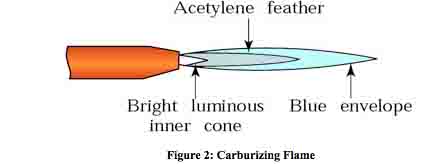
“This flame is obtained by first adjusting to neutral and then slowly opening the acetylene valve until an acetylene streamer or “feather” is at the end of the inner cone.” – Weldguru.com
Oxidizing Flame
An oxidizing flame is created when there is more oxygen present than acetylene in the flame. This flame is best used for applications such as soft solder, brazing, annealing, and tempering.
The oxidizing flame has a sharp hissing sound and is easy to recognize.
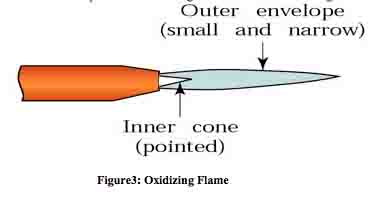
“To obtain this type of flame, the torch should first be adjusted to a neutral flame. The flow of oxygen is then increased until the inner cone is shortened to about one-tenth of its original length. When the flame is properly adjusted, the inner cone is pointed and slightly purple.” –Weldguru.com
Reference Chart
Neutral

Welding, Silver Soldering
Carburizing

Bending, Forging, Hardening
Oxidizing

Soft Soldering, Brazing, Annealing, Tempering
Please print off the above chart to add to your shop notebook as a quick reference guide. This will not only save you precious time but will also yield better results. Having a basic understanding of flame types is invaluable in the gunsmith’s shop.
Written by: Kurt Martonik
Kurt is a Gunsmith, Reloader, Hunter, and Outdoorsman. He grew up in Elk County, Pennsylvania, where he became obsessed with the world of firearms. Following high school, Kurt enlisted in the United States Air Force as a Boom Operator, where he eventually rose to the position of Instructor. After his military service, he attended the Colorado School of Trades(CST) in Lakewood, CO for gunsmithing. Following graduation, he accepted a job at C. Sharps Arms in Montana, where he worked as a full time stockmaker and gunsmith.